How To Do Hand Lettering On A Poster Tutorial
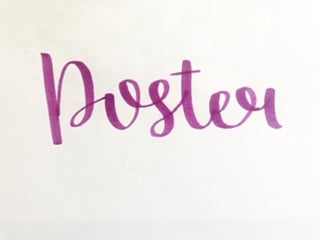
In this tutorial, I am going to go over the step by step process that I use for doing hand lettering on a poster, or any other type of big calligraphy projects.
First off this is my own step by step process and a lot of people have their own styles and their own way of doing things. The way I do things may be different than other hand lettering artists.
This is just a process that I think would be great for beginners to know and understand. You could either follow this completely or just grab something out of here and bring it into your own process.
Now here is a quick summary of what we are going to be talking about:
- Step 1: Find The Right Materials
- Step 2: Layout your idea on a regular sheet of paper
- Step 3: Transfer It onto Your Poster
- Step 4: Ink The Piece
- Step 5: Final Touches
Now onto the tutorial…
Step 1: Find The Right Materials
One of the most important things when doing calligraphy and hand lettering is the materials that you are going to be using.
It is also important to find the right materials. So right now I am going to be giving you recommendations of the right materials for this project.
First, let us just go over the basics:
- Pencil (Any Pencil Would Be Fine)
- Extra regular-sized sheets of paper
- Ruler
- Regular Ball Point Pen
Now let us go to the more complicated materials…
POSTER
There are a lot of different papers or paper boards that you can use for your big poster.
But if you are just starting out a big sheet of paper would do just fine.
In this tutorial, I am going to be using an 11.7 in x 16.5 in sheet of paper from one of my bigger sketch pads.
Also depending on the type of pens that you are going to be using different types of paper.
If you are using a dip pen you would use more of a thicker and rigid paper.
While if you are using brush pens I recommend looking for some smoother paper, but it might be hard to find that type of paper in big sizes.
But it is still very possible to use your brush pens on those types of papers, you would just have to be prepared for some fraying (leading for your brush pens not to last as long).
If you are wondering what this is you can check out my article all about why your brush pens might be fraying and what this is.
But a regular sketch pad with some nice large sheets of paper would be great for this tutorial.
WRITING UTENSILS
Now we need to talk about the different writing/drawing utensils that you are going to need for today.
First, if you are a brush lettering artist you would of course be using your brush pens.
If you are more into dip pen calligraphy you may use your dip pens.
All of this is personal preference.
Some people even use a regular ballpoint pen for faux calligraphy or just colored pencils. Sometimes even just a regular pencil is a utensil you can do calligraphy with.
So any type of utensils you decided to do calligraphy with is what you are going to need for this tutorial.
I am going to be using a chisel tipped marker and a regular ballpoint pen for my poster today.
Step 2: Layout Your Idea On A Regular Sheet of Paper
Before we even move onto writing onto our big sheet of paper I recommend drawing out your layout on a regular-sized sheet before we move on.
This will help us figure out the different elements in our lettering illustration, and how to lay it out on the bigger sheet of paper.
First I am quickly going to sketch out a very vague design onto a sheet of paper, this does not have to be perfect.
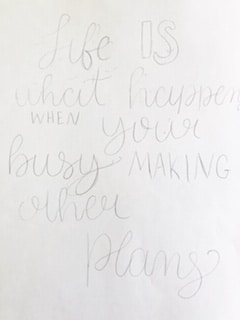
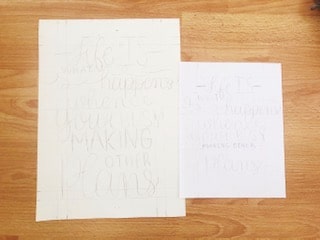
As you can see above I just wrote it out trying to quickly figure out where everything is going to go. This then shows me that the word “when” has to be a bit bigger in my next design.
Or that I should instead move the word “other” on the right side and the flourish on the letter “Y” To fill in some blank space.
It just gives me an idea of what I should do.
Some other things that you should think of during this process are:
- Are any of my ascenders/descenders affecting my other letters
- Can you add block letters into your design
- Would You Like To Add filigree or flourishes into the design
You can continue doing this process over and over again you feel great about this initial design.
But now let us move onto what we are going to do next…
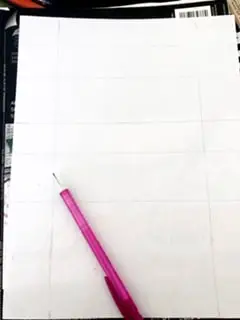
I am quickly going to draw out my guidelines with my pencil and ruler onto another sheet of paper and keeping the other design in mind.
Now I am going to sketch out my last and final plan of what I am going to draw out on my poster.
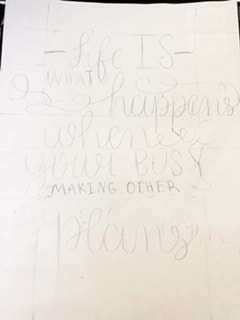
As you can see it is not at all perfect. This is just going to be my guide for when the time comes to drawing onto my bigger sheet of paper.
If you want to take a step further you can start inking your piece and then get a better guide when lettering on your big project.
I actually find all of this more helpful if you do your plan on a whiteboard.
It would just make it easier to erase and move things around.
Step 3: Transfer It Onto Your Poster
When starting out it may be hard to be able to transfer your design and make it bigger.
So I recommend onto your bigger sheet of paper to create the same guidelines that you make on your smaller sheet of paper.
This can help you place your words in around the same areas as before.
If you want to get a little bit more complicated we can create a graph.
So you would grab your old design and draw a light graph over it.
Then try to copy the exact graph onto our bigger sheet of paper, then leading it to become a little bit easier to transfer your design in around the same layout.
I find this is great for beginners who have a hard time copying their designs and really want it to come out “perfect”.
If you are having a hard time trying to layout your words on the bigger sheet of paper try to mix up your design above.
Don’t feel like you have to completely copy your design onto your poster. Mix it up a bit.
Maybe try different types of flourishes than you did on your initial plan.
Or anything else that you find might be hard to “copy.”
During this time I recommend thinking about your color scheme and if you are going to be adding any more designs onto the piece afterward.
Getting a sense of the color scheme will help us in the following step.
Step 4: Ink The Piece
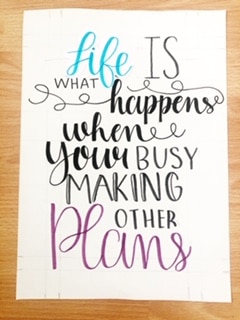
Now after transferring the piece with a pencil let us start inking.
This can be different for a lot of different people since there are a lot of different materials that you can do calligraphy with.
Here I am just going to be using the faux calligraphy technique and using alcohol-based markers to finish up this poster.
If you’re wondering what faux calligraphy is and how you can use it you can check out my tutorial all about it here.
When inking the piece I recommend just lightly erase your sketch before you start since sometimes you can see the pencil marks (if you are using brush pens or markers).
Step 5: Final Touches
Here you are now going to go over everything and make sure that all of your pencil marks are gone.
Going over it a few times would help you make sure that there are no pencil markers or other things you can go over.
Final Thoughts
You have now learned exactly how you can create your poster with your hand lettering.
If you are having any more questions about the lettering layout, how to transfer your design, or anything else feel free to comment.