How To Do Calligraphy With Sharpie
A lot of the time when learning hand lettering, especially on a budget, you don’t have the “right” supplies. So today I am going to be teaching you how to do calligraphy with a sharpie.
Quick and short answer:
One way to do calligraphy with a sharpie, is by doing faux calligraphy. Another way, which is similar to using a Crayola marker, is changing the angle of our sharpie to create thick and thin lines.
I am going to be going more in-depth later.
Here is a summary of this post:
- Materials
- Faux Calligraphy With Sharpie
- The Basic Strokes
- 2nd Way To Do Calligraphy With Sharpie
- Final Thoughts
Materials
You are going to need a couple of different things for this tutorial.
- A regular Sharpie
- Pencil
- Ruler
- Eraser
- Thick Bleed Proof Paper
RECOMMENDATIONS
For paper, it is important that you use very thick paper, like cardstock. I also would recommend using mixed media paper, like the Canson Mixed Media Pad.
But something that won’t bleed through is going to be perfect for your sharpie.
Any pencil will do, we have a pencil to layout our letters.
Faux Calligraphy With Sharpie
Here I am going to be going over how to do faux calligraphy with a sharpie. I actually have a full tutorial on this which you can check out here.
STEP 1
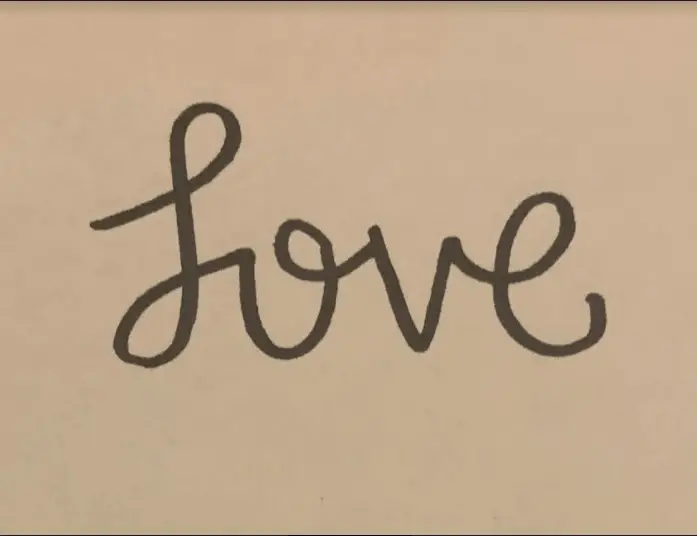
Draw out your word or phrase. When doing this you have to keep in mind the basic strokes, which is very important for modern calligraphy.
If you have no idea what this is, don’t worry, I will be talking about it in the next section.
STEP 2
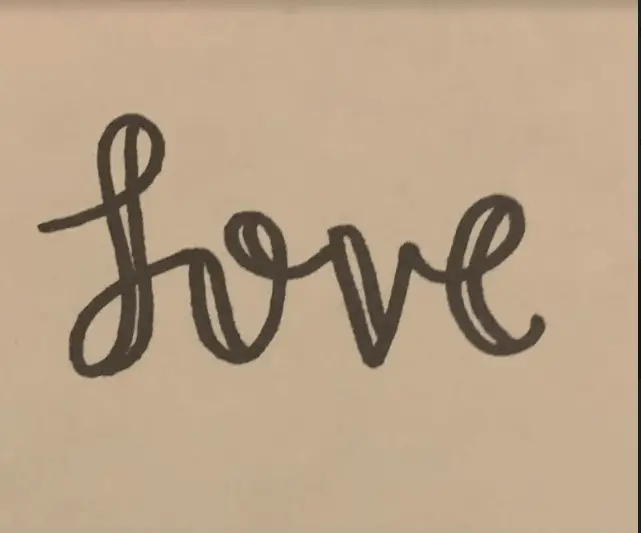
Where all of your downstrokes are create a separate line. Here is an example. Downstrokes are part of the basic strokes, which again will be in the next section.
STEP 3
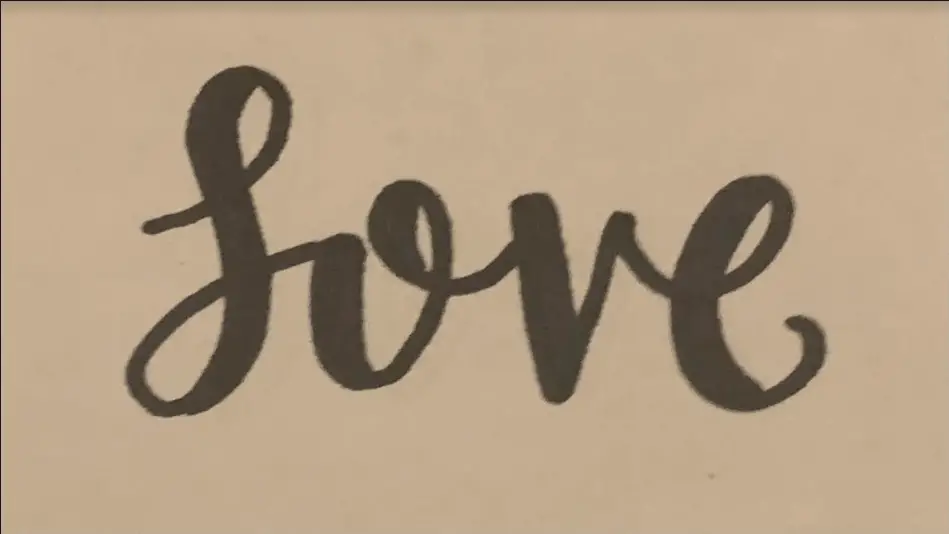
Fill in the black space, where all of the downstrokes are.
Basic Strokes
So what are the basic strokes…
The basic strokes are the very base of your modern calligraphy. It is what makes up your letters and how you construct them. If you are not using the basic strokes (for this type of calligraphy) you are not doing it right.
If you want a full in-depth tutorial on these check out my article here.
THEY ARE:
- Upstroke
- Downstroke
- Underturn
- Overturn
- Ascending Loop
- Descending Loop
- Oval Compound Curve
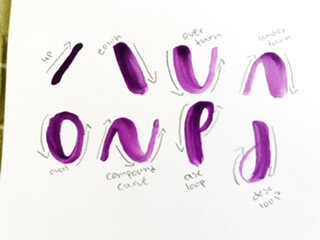
You can use these to form your letters.
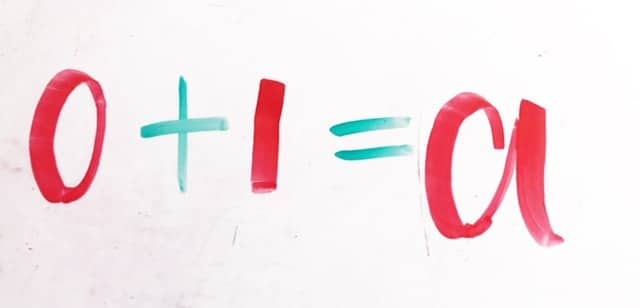
This just means that all downstrokes are going to be thick and all upstrokes are going to be thin.
Example:
2nd Way To Do Calligraphy With Sharpie
Now the last way you can do calligraphy with a sharpie is actually very similar to a Crayola marker.
So you are going to have to learn how to change the angle of the pen and how to hold it.
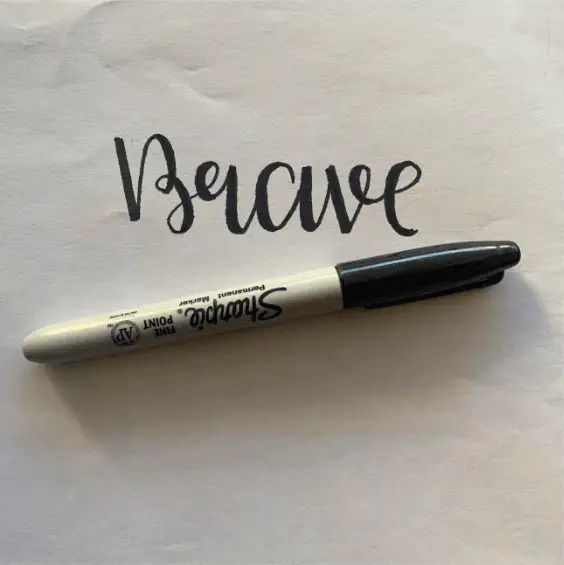
Whenever you are doing an upstroke you are going to hold your sharpie as you would do regularly. Then when doing a downstroke you are going to change the angle of your pen so that the whole entire side of the nib is touching the paper. At the same time, you are going to want to apply more pressure.
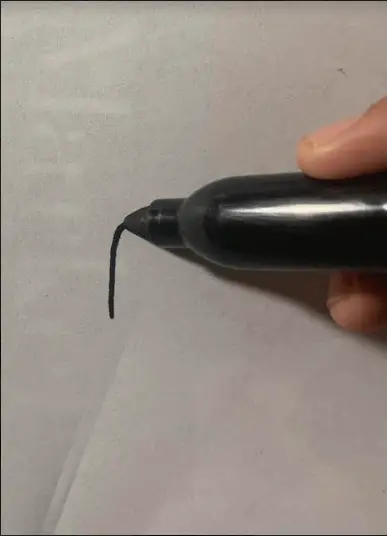
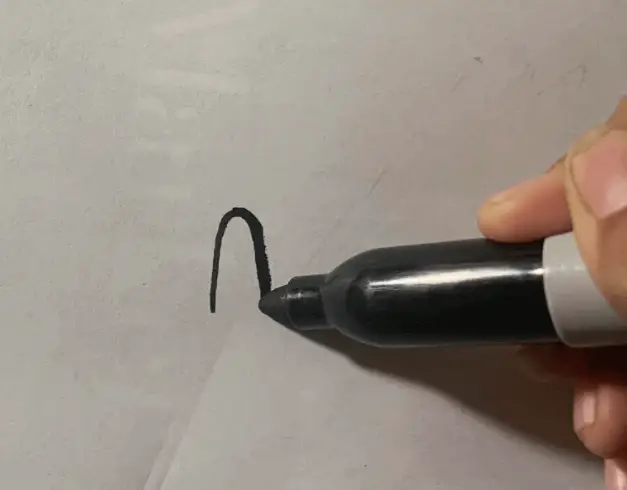
Upstrokes light pressure, Downstrokes More Pressure (and holding it in a different angle).
I did this technique in the first picture, that is at the beginning.
During all of this, you are of course going to take the basic strokes into consideration.
Final Thoughts
Now you have learned some of the basics to do calligraphy with a sharpie. If you are wanting to learn hand lettering on a budget you might also like to learn to do calligraphy with a pencil, or Crayola marker.
Key Points
- Use the basic strokes, it will help you learn in the long run.
- Learn to hold the Sharpie correctly.
- Perfect practice makes perfect.
If you have any more questions about hand lettering and calligraphy in general, feel free to comment.