What are Clear Brush Pens?
So you got some new awesome brush pens. When you open your pack you notice that there is this cool clear brush pen. You test it out thinking that there must be something to it. Now it just comes out clear. Do you wonder what are clear brush pens?
I can clearly now tell that you are a newbie to brush lettering. Well, these Clear Brush Pens are some awesome brush pen blenders. You use these to be able to blend some colors together. It is as simple as that.
In the rest of the article, I am going to be talking about everything you are going to need to know about these awesome brush blenders. This is just a summary of what I am going to teach you today:
- How to use a Brush Pen Blender
- Cool ideas that you can do with your Brush Pen blender
- What to do if your blender is not working for some reason
Let us get started…
Step by step guide: To using a Brush pen Blender
So you have now figured out what this cool brush pen is, now you might be wondering, how in the world am I going to be able to use it.
First, I recommend getting the correct paper for your brush pens. I have another article explaining why it is so important for using the correct paper when brush lettering.
But in this case, you should be using at least bleed proof paper because trust me your pens are going to bleed.
Now
Let me show you the cool thing that we can do with these brush pens.
You are first going to choose two colors, you could even do more than two colors (5 should be the max).
You are going to want to take out the lightest color brush pen that you chose and just write down your word or design of your choice.
Once that is done you are going to want to just put your dark color down at the bottom, top, in the middle, you could honestly do anything with this technique.
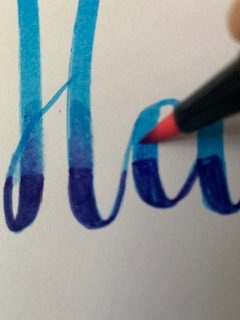
After doing that take out your blender and just start pulling up the ink from the dark color onto the lighter color to get a sort of Ombre effect.
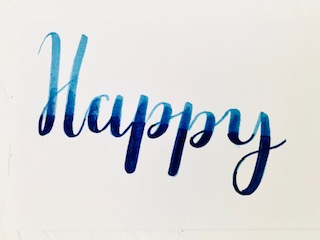
Honestly, this technique can be used in many ways. This is just barely the base of what we can do with the blender. The blender can really help you create some nice cool effects in your calligraphy.
Cool Ideas To do with your Blender
There are of course so many other things you can do with your brush pen blender. Right now I am going to be showing you other techniques and fun ways to make your illustrations unique.
One awesome idea is a fade-out effect to do with your brush pens. What you are going to need for this technique is :
- Bleed proof paper
- Brush pen Blender
- Brush Pen of your choice
- Plastic bag
The first thing you are going to want to do is scribble on your plastic bag all you want.
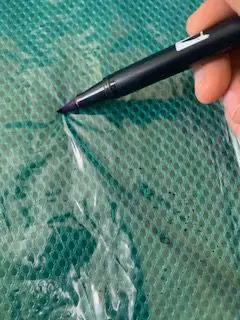
After doing that grab your brush pen blender and scribble on top of that. This will lead to your brush pen blender to collect up the ink that you had on your plastic bag.
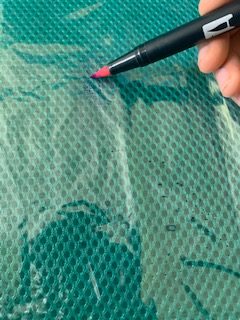
Now you can write/ draw a lettering illustration of your choice. You will notice that it will have this fade-out effect that it is quite cool (in my opinion).
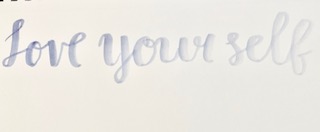
By any chance that you don’t have a plastic bag at that moment here is another way you can do it.
You are going to want to grab the brush pen of your choice and hold it up so that it touches your blender. You will notice that some ink is going to transfer onto the blender.
Another thing that you can do is just right with the colored marker onto the tip of the brush pen blender.
Now right any illustration of your choice. With this, you will get the same effect that I have shown above.
You could also use two colored markers and get the same effect but instead of it fading out you will start with one color and then fade into another color. Which can make your lettering illustration look cool.
Let’s move on…
Another cool way to use your brush pen blender is…
Create Galaxy or Ti Dy lettering illustration.
So you probably have been all over the internet looking at these awesome galaxy letters. You’re wondering how in the world did they do it?
Some people used a regular brush and watercolor to create this cool lettering illustration. But some other people did it a different way.
We are going to be using the first technique that saw above and just start blending different colors in our word to create this awesome and cute illustration. Quite easy when you think about it.
Here is a link to another how-to on galaxy lettering.
Now let us move on to something else
This is another technique that I like to call fade in and out.
It is quite different from the fade-out technique.
We are going to be just getting a brush pen of our choice ( I have noticed that it works better if you use a lighter/ pastel color).
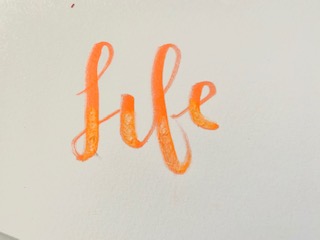
Once we have done that we are going to grab our colorless blender and just start picking up the color in some areas. Here I am just going to be picking it up at the bottom of the letters.
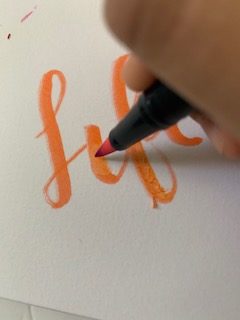
What you are doing when you are going in the areas that you want a lighter color is picking up some ink off of the paper. This will create a nice cool looking lettering.
What to do if your colorless blender isn’t working?
After a year of use, you might start to notice that your colorless blender has stopped working. This is just like a dried-out brush pen.
This has happened to me and I tried the same thing that I always do when my brush pens don’t have any ink in them left. I will leave the colorless blender in a cup of water (with the cap off) overnight.
You will notice the next day that it will start working instantly again and you won’t have any more problems.
Here is a link to a post that shows you exactly what to do: https://ximenaletteringart.com/helpful-guide-to-reviving-your-brush-pens/
Conclusion
You have now found out what a colorless blender is and how you are going to be able to use it in your awesome lettering illustrations. This tool will be able to help you come up with different designs, colors, and your own unique style to your calligraphy.
