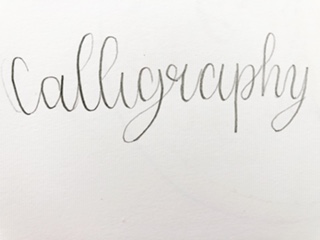
What I Wish I Knew Before Starting Lettering
In this calligraphy/ lettering tutorial I am going to be talking about some myths and things I wish I knew before starting to become a lettering artist.
These are just going to be simple tips that all people starting out in any type of calligraphy should know before starting. If you have any more questions feel free to comment.
Here is a brief summary of the things that I am going to be talking about today:
- Paper For Lettering
- Calligraphy vs Cursive
- Basic Strokes
- Water with Brush Pens
- Pencil Calligraphy
- Holding Brush pen
- Guidelines
Paper For Lettering
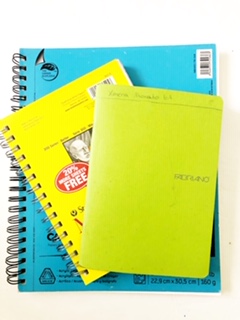
One of the biggest things that I wish that I knew when starting out lettering is the paper. I always thought that you could just use regular printer paper and you are fine.
I WAS SOOO WRONG
Especially when starting out brush lettering I did not know that you have to, you have to use smooth paper. You might be thinking isn’t printer paper smooth though.
The truth is printer paper is no way smooth enough. Since I was using printer paper to practice it led me to fray my brush pens.
If you don’t know what fraying brush pens are or want to learn ways to use these brush pens here is a link to my article about it. You can click here.
When I started to fray my brush pens I was very confused so I researched and learned that because I was using printer paper that is not smooth enough it was ripping up the felt tip of my brush pen.
Calligraphy vs. Cursive
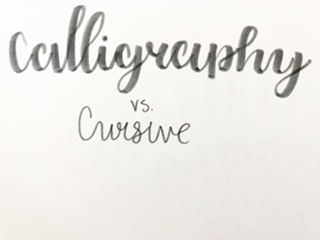
When I barely started calligraphy and especially when starting out doing faux calligraphy I just thought it was cursive with different thickness of lines.
This is completely wrong. When doing faux calligraphy I just thought that you write out something in cursive and then thicken the downstrokes. Well, I was completely wrong.
I learned that Calligraphy has a completely different structure than Cursive. And that you don’t need to know cursive to be able to learn calligraphy. You could find my article all about this topic here.
Any moving on from that let us talk more about the structure of the calligraphy.
The Basic Strokes of any Type of Lettering
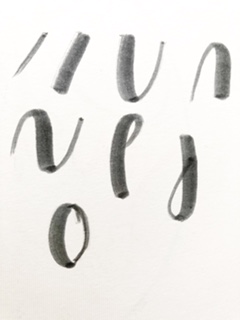
The basic strokes are something that I didn’t know about until months of trying to learn how to do lettering. Well, that is something that you don’t want to do when learning how to do calligraphy.
The very first thing that you should know when starting calligraphy is the basic strokes because that is the structure that you are going to need to build off of to create letters, words, and phrases.
In these articles, I talk about Basic Strokes more in detail.
Anyway, the very first thing I did is just going right into practicing the letters. Witch is the complete opposite of what you are going to want to do.
The very first thing is you should either print out some practice sheets of the basic strokes or look them up online (aka look at the articles above to see them more in detail) so that you are able to do them too.
Water With Brush Pens
One of the things that I didn’t know that you can do with brush pens is that you could use water with them.
When starting out I bought myself a Tombow dual brush pen set. One day while scrolling through youtube is that you can use water-based brush pens for watercolor and they can be blended with water.
I was quite astonished because I had no idea that you could do that. When looking through this youtube video I thought that I needed that cool blending card from Tombow but I was wrong.
I later soon found out that you could just use a sheet of plastic or a regular plastic bag. With this finding, I started learning how to do watercolor lettering.
I also started adding watercolor backgrounds to my lettering and it allowed me to be able to create cooler more colorful lettering illustrations.
By any chance, you want to check out my article for a Watercolor Lettering Tutorial For Beginners click here.
Pencil Calligraphy
Something that I would have wished to know before starting is that you are able to do Calligraphy with a pencil or any regular old sharpie.
This is of course would have been very helpful because at the time I didn’t exactly have the budget to be able to by a lot of calligraphy pens and brush pens.
When learning that you can do Pencil Calligraphy and still be able to create cool lettering designs I was astonished because I now know how to do lettering with any type of writing utensil.
Of course, learning faux calligraphy also helped me be able to stay on budget but it would have been way cheaper to at first start practicing with a pencil than instead with microns or brush pens.
If you are wondering if you can do pencil calligraphy yourself click here.
Holding A Brush Pen
A lot of people when starting out don’t take into consideration that the way you hold a calligraphy utensil or brush pen is very important.
After looking up the basic strokes they don’t take in mind how you are actually supposed to be holding a brush pen.
This was me when staring out. I never thought that there had to be a specific way to holding a brush pen but I guess there is.
Once I learned how to hold the brush pen correctly it really helped me to be able to create smoother strokes. It also helped me to create thinner upstrokes and thicker downstrokes.
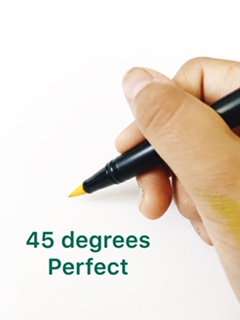
The number one thing when holding a brush pen is to hold it at a 45-degree angle to the paper.
A lot of the times when starting out it would be hard to get used to holding a writing utensil that way. Usually, with a regular pencil, we would be holding it at almost a 90-degree angle.
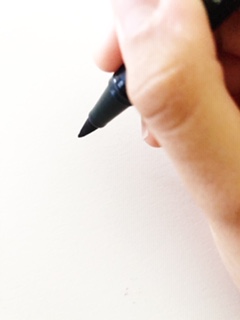
At first, I was holding my brush pen almost just like a regular pen or pencil.
First, this could lead to your brush pen to get frayed easily because when holding it in this way you are always putting a lot of fo pressure to the very tip of the brush pen.
While if you were holding it correctly then you would balance the pressure out to the whole entire felt tip.
Second, if you are holding it at a 90-degree angle it is going to be harder to be able to have a steady hand and create thinner upstrokes and thick upstrokes.
Using Guidelines
I have noticed that a lot of beginners miss this one and I was one of them. So you just bring out a sheet of smooth paper and your calligraphy utensil and you just start writing.
You completely missed a step.
DRAW OUT YOUR OUTLINES
In calligraphy as a beginner, you should always be aiming for consistency in all of your strokes. Without drawing your guidelines or outlines (whatever you want to call it) you are never going to reach that goal.
Without drawing your guidelines you would get inconsistent letters and strokes.
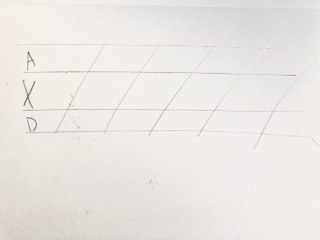
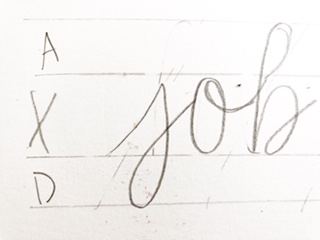
At first, I didn’t know what the x-height was. If you are wondering what all of this is let me just show you.
So we have the x-height then we have the ascending space and the descending space.
We also have lines in between all of that to make sure that all of our letters are at the same angle.
Of course, you can always choose what angle you want your letters to be you don’t even have to have an angle at all.
Anyway, the point is when starting off calligraphy and even for all of the pros out there you should be drawing your outline before you do anything.
Conclusion
You have all just learned everything that I wish I knew before starting out learning how to do lettering/ calligraphy.
If you yourself in the comments want to add some other things to include go ahead. Anyway just remember the most important ones. ( In my opinion) they are calligraphy vs. cursive, holding brush pen, paper, and guidelines.
Remember those and I think you are all set.